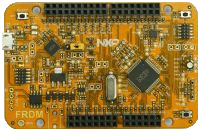
FRDM-KV11Z

-
Core
Cortex-M0+
-
Device
MKV11Z128VLH7 -
CMSIS Pack
FRDM-KV11Z_BSP
-
i2c_interrupt_b2b_transfer_slave
µVision AC6The i2c_interrupt_b2b_transfer_slave example shows how to use i2c driver as slave to do board to board transfer with interrupt:In this example, one i2c instance as slave and another i2c instance on the other board as master. Master sends a piece of data to slave, and receive a piece of data from slave. This example checks if the data received from slave is correct.
Download Pack -
i2c_polling_b2b_transfer_master
µVision AC6The i2c_polling_b2b_transfer_master example shows how to use i2c driver as master to do board to board transfer using polling method:In this example, one i2c instance as master and another i2c instance on the other board as slave. Master sends a piece of data to slave, and receive a piece of data from slave. This example checks if the data received from slave is correct.
Download Pack -
i2c_polling_b2b_transfer_slave
µVision AC6The i2c_polling_b2b_transfer_slave example shows how to use i2c driver as slave to do board to board transfer with a polling master:In this example, one i2c instance as slave and another i2c instance on the other board as master. Master sends a piece of data to slave, and receive a piece of data from slave. This example checks if the data received from slave is correct.
Download Pack -
i2c_read_accel_value_transfer
µVision AC6The i2c_read_accel_value example shows how to use I2C driver to communicate with an i2c device: 1. How to use the i2c driver to read a i2c device who_am_I register. 2. How to use the i2c driver to write/read the device registers.In this example, the values of three-axis accelerometer print to the serial terminal on PC throughthe virtual serial port on board.
Download Pack -
led_blinky
µVision AC6The LED Blinky demo application provides a sanity check for the new SDK build environments and board bring up. The LED Blinky demo uses the systick interrupt to realize the function of timing delay. The example takes turns to shine the LED. The purpose of this demo is to provide a simple project for debugging and further development.
Download Pack -
log_bm
µVision AC6The log demo is used to demonstrate how to use log component. The main function of the demo is to prompt the LOG level string according to the user input log level command.
Download Pack -
lptmr
µVision AC6The LPTMR project is a simple demonstration program of the SDK LPTMR driver. It sets up the LPTMRhardware block to trigger a periodic interrupt after every 1 second. When the LPTMR interrupt is triggereda message a printed on the UART terminal and an LED is toggled on the board.
Download Pack -
mcg_fee_blpe
µVision AC6The fee_bple example shows how to use MCG driver to change from FEE mode to BLPE mode: 1. How to use the mode functions for MCG mode switch. 2. How to use the frequency functions to get current MCG frequency. 3. Work flow Boot to Fee mode from default reset mode Change from FEE -> FBE -> BLPE Change back BLPE -> FBE -> FEE Get System clock in FEE mode to blink LEDIn this example, because the debug console's clock frequency may change,so the example running information is not output from debug console. Here theLED blinks to show that the example finished successfully.
Download Pack -
mcg_fee_blpi
µVision AC6The fee_bpli example shows how to use MCG driver to change from FEE mode to BLPI mode: 1. How to use the mode functions for MCG mode switch. 2. How to use the frequency functions to get current MCG frequency. 3. Work flow Boot to FEE mode from default reset mode Change from FEE -> FBI -> BLPI Change back BLPI -> FBI -> FEE Get System clock in FEE mode to blink LEDIn this example, because the debug console's clock frequency may change,so the example running information is not output from debug console. Here theLED blinks to show that the example finished successfully.
Download Pack -
mcg_fei_blpi
µVision AC6The fei_bpli example shows how to use MCG driver to change from FEI mode to BLPI mode: 1. How to use the mode functions for MCG mode switch. 2. How to use the frequency functions to get current MCG frequency. 3. Work flow Boot to FEI mode from default reset mode Change mode FEI -> FBI -> BLPI Change back BLPE -> FBI -> FEI Get System clock in FEI mode to blink LEDIn this example, because the debug console's clock frequency may change,so the example running information is not output from debug console. Here theLED blinks to show that the example finished successfully.
Download Pack
